Sunday, January 29, 2012

Pitot: French for PITA

I think it has been more than two weeks now, maybe longer, that I have been deluding myself into thinking that I am just [this] far from hanging the propeller on the engine. I can see it, right there on the next page of the plans; all I have to do is get the pitot tube installed.

"The what?" you ask? Well, to put it simply....
pitot (play /ˈpt/tube is a pressure measurement instrument used to measure fluid flow velocity. The pitot tube was invented by the French engineer Henri Pitot in the early 18th century and was modified to its modern form in the mid-19th century by French scientist Henry Darcy. It is widely used to determine the airspeed of an aircraft and to measure air and gas velocities in industrial applications. The pitot tube is used to measure the local velocity at a given point in the flow stream and not the average velocity in the pipe or conduit.

The basic pitot tube consists of a tube pointing directly into the fluid flow. As this tube contains fluid, a pressure can be measured; the moving fluid is brought to rest (stagnates) as there is no outlet to allow flow to continue. This pressure is the stagnation pressure of the fluid, also known as the total pressure or (particularly in aviation) the pitot pressure.

Theory of operation

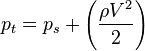
The measured stagnation pressure cannot of itself be used to determine the fluid velocity (airspeed in aviation). However, Bernoulli's equation states:
Stagnation pressure = static pressure + dynamic pressure
Which can also be written
p_t = p_s + \left(\frac{\rho V^2}{2}\right)
Solving that for velocity we get:
V = \sqrt{\frac{2 (p_t - p_s)}{\rho}}
Note: The above equation applies only to incompressible fluid.
where:
  • V is fluid velocity;
  • pt is stagnation or total pressure;
  • ps is static pressure;
  • and ρ is fluid density.
The value for the pressure drop p2 – p1 or Δp due to Δh, the reading on the manometer:
Δp = ρ g Δh
Where:
  • ρ is the density of the fluid in the manometer
  • Δh is the manometer reading
The dynamic pressure, then, is the difference between the stagnation pressure and the static pressure. The static pressure is generally measured using the static ports on the side of the fuselage. The dynamic pressure is then determined using a diaphragm inside an enclosed container. If the air on one side of the diaphragm is at the static pressure, and the other at the stagnation pressure, then the deflection of the diaphragm is proportional to the dynamic pressure, which can then be used to determine the indicated airspeed of the aircraft. The diaphragm arrangement is typically contained within the airspeed indicator, which converts the dynamic pressure to an airspeed reading by means of mechanical levers.
Meh, those people get paid by the word (with bonuses paid for using quad-syllable or more words). To put it more simply, the pitot tube collects the air that is used to drive the speedometer.

I've mentioned the changes from traditional configurations that were made in the RV-12 to provide for the removable wings, and the location of the pitot tube is yet another of those. Most small planes have the pitot tube under one of the wings. Having the pitot on the RV-12 wing would require a fitting at the wing root to allow for the connection and disconnection of the air tube that runs from the pitot to the airspeed indicator, or in the case of the RV-12, the air data computer. That would be just one more thing to forget when re-attching the wings, so Van's moved the pitot tube to a rather exotic location: it protrudes from the very front tip of the propeller spinner. This is somewhat similar to the cannon mounted in the WWII P-39 Airacobra.

The net effect for the builder is that the installation of the pitot is a PITA.

pita
1) Acronym for Pain In The Ass, a major annoyance.
2) Flat bread of Mediterranean origin, eaten as is or filled with small pieces of roasted meat, veggies, condiments, etc.
1) Reinstalling everything after a virus was a true PITA.
2) Greek-style pita is round and thickish, while Cypriot-style pita is elongated and thin.

It's definition #1 that best fits the occasion.

The first step was the preparation of the tube. Van's provides a somewhat convoluted procedure involving masking tape, a collection of washers, and a few paragraphs of obfuscatory text to keep things interesting. The end result is a dimple that will assist a locking screw in the critical job pf keeping the pitot tube attached to the airplane and correctly oriented to the preferred airflow direction.


When drilling this hole, it is strongly preferred that the hole, which is not really a hole per se, not become an actual hole. Rather, the idea is to drill it just deep enough that a small bump becomes visible inside the tube. For this job, I chose the eminently controllable hand drill that worked so very well when drilling the delicate canopy glass.


I paused after every few twists to take a look to see if the bump was showing yet. As it turned out, Pete saw it first. It really looked just like a piece of dirt that had gotten into the tube. It was a small bump indeed.


I found out later that it was actually on the wrong side of the tube, so we got to do this part twice.

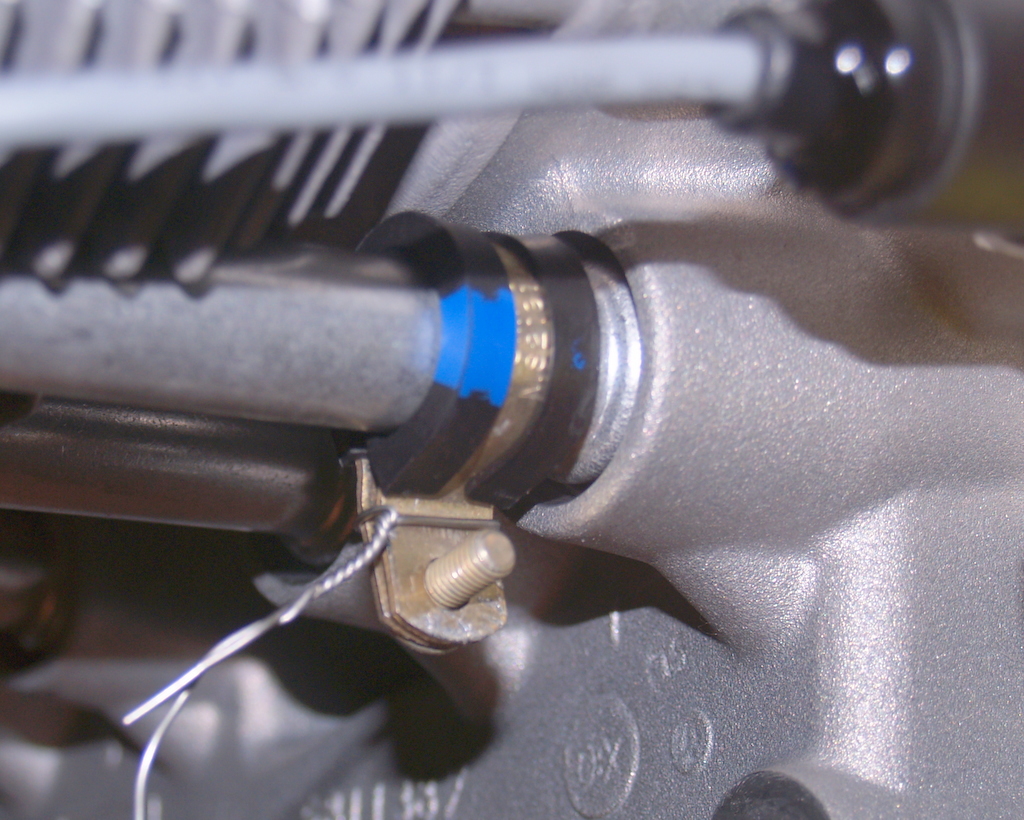
Then we installed the plastic-ish block that holds the tube. This is where the PITA-factor came in. First, the plans referred to the "threaded" side of the block, but I was unable to find any threads. The tube fit tightly enough that I think it tapped some threads on the way in, though. The bottom aft edge of the block also had to be chamfered a little bit to give clearance from the cooling shroud. This would be the least of the difficulties with the shroud. Do you see the bolt that's only partially screwed in? That would be because the cooling shroud obstructed any kind of tool from working on the bolt.


I tried using fingers, but it put up too much resistance.


I enlisted the aid of pliers.


Getting the thing tightened was difficult. Getting it safety wired was even more so.


The pitot line had to be attached to the pitot tube using a small length of plastic, cleverly sized by the engineers at Van's to be precisely one nanometer too small. It took one of Pete's innovative ideas (using an open end wrench to fork over the smaller pitot tube and put pressure against the larger tube with the sides of the wrench "fork") to get the tubes installed. That was difficult, but again it was the safety wiring that was worse.


All in all, this took almost three hours out in the cold, after which I had no appetite for the cutting/fitting work that will have to be done on the spinner before the propeller can be installed. I've given up on trying to guess when that will be.

Sunday, January 22, 2012

Drainage

It was another long week of long hours in the salt mine followed by construction-impeded commuting this week, and although it was only four days, it felt much longer. Besides being too tired to brave the bitter cold temps in the hangar, I had to re-visit one of my recent home repairs. I came to notice that the dishwasher wasn't draining as it ought, a determination that was fairly easy to make when I opened the door and saw nasty old water just a smidgen of an inch away from overrunning the edge.

My first thought was that I'd soon be forking over a few hundred bucks to an appliance repairman, but the coincidental timing of it, coming right on the heels of my having replaced the garbage disposal as it did, made we wonder... could these events be related? Wouldn't that be more likely? Yes, yes it would.

I thought I'd review the installation instructions to see if maybe I had missed something having to do with the tube that the dishwasher drain hose attaches to. The more I thought about it, the more I became convinced that I might be on the right track. After all, not everyone would use that pipe and those that didn't probably wouldn't appreciate the messy water that would pour out of it if the disposal became backed up. Surely there was some form of plug that I was supposed to have removed. This would all be answered once I retrieved the installation directions from whatever safe place that I had had stored them in to prevent their loss.

Yeah, it's a good thing I was able to find a PDF version of them on the internet.

Sure enough, right in the middle of the preparatory steps that I had ignored because all of the parts installed in those steps were already installed in my sink was a step that showed how to knock out the dishwasher drain plug.

It was an easy fix, but I'm becoming more than a little concerned over my propensity for requiring multiple attempts to get something right. I'm building an airplane, you know. Think about that...

Today's airplane work also involved tubes and hoses and drainage. The first hose to be installed is the hose that will provide manifold pressure information to the flight management computers. Manifold pressure is typically used as an engine power reference in more complex airplanes than the RV-12, but having access to more engine performance information than I'm used to having is just fine with me, besides which, the installation of the hose took about five minutes. Most of that was spent tracking down which hose to use.

First step: cut off a 15" length of this stuff.


Then remove one of those Rotax plugs from the manifold pressure nipple. It's plugged by default because Rotax, just like the folks at Badger Garbage Disposals, doesn't know if the final installation will use the manifold pressure or not.


Finally, attach point A to point B with the hose, then tie it into place.


Then it was on to something brand new. Apparently there have been a lot of problems with the fuel pumps on some of the older RV-12s that involved a lot of fuel leaking from the pump. Fuel leaks are not good, but they are even worse if the leaked fuel doesn't have a safe path out of the engine compartment. I have one of the new fuel pumps, as can be determined by the existence of a fuel drain nipple built into the pump. Just letting the fuel drip out of that nipple wouldn't do any good; it needs to be chauffeured overboard. This involves rubber hose, clamps, and aluminum tubing. All of the parts and materials required come in a single bag. I suspect this packaging will allow retrofit kits to be sent to owners of the older RV-12s.

The hose is cut into two lengths: a 2" piece, and a 19" piece. That leaves a short piece of left over hose - that came in handy a few steps later.


The 2" piece gets attached to the fuel pump with a clamp. A 1/4" nut driver worked best for securing the clamp; I tried a number of different screw drivers, but the slots in the clamps were kind of weird - they rejected the screw drivers. There's probably some special tool for that, or I'm just clumsy. I'm right around 50-50 on which it is.


There will eventually be an aluminum hose that runs underneath the cylinders, but for now we just install two cushion clamps that will make up half of an assembly that will secure the hose.


These cushion clamps are notoriously difficult to work with. Van's suggests using safety wire to hold them closed while getting the screw in place.


The one at the back of the engine was much harder to get at. It took some clever coordination of locking tools to get the safety wire on.


The 1/4" aluminum tube comes rolled up, so the next step is to roll it flat, then cut it to length. Both ends then get flared.


The standard flare is too big to fit in the hose, so it needs to be filed down. The ScotchBrite wheel made short work of that. With the two pieces of hose already on the airplane, the extra left over length came in handy for testing the fit.


The aluminum line then gets bent to fit, which is simply a matter of bending it to match the full size template provided in the plans. By "simply," of course, I mean it was somewhat complicated. The problem is that the line gets bent in three dimensions, but the flat pages of the plan can only show two at a time. It takes some skill at visually imagining a 3D part based on 2D drawings, a skill that I do not have in anything approaching sufficient quantity. I muddled through, though.

The aluminum line fit well enough, so it was on to the final task: getting the line secured with the remaining cushion clamps. The first was difficult, but it turned out well enough.


The second was horrible. I had to resort to using the surgical clamps that I had picked up in the neurological surgical tools aisle at Harbor Freight (Harbor Freight: The Home of the "No More Than 75% Post-Operative Mental Acuity Loss" guarantee!) to hold things in place while I tried to get the fasteners installed.


Finally, just a couple of tie wraps are used to hold the hose in place. I don't know if there are any steps coming later than do a better job of securing the loose end of the rubber hose in place, but if not I will just figure out a way to do it myself.

Tuesday, January 17, 2012

The dog days of.... Winter?

When it's only 25 degrees in the hangar, I don't spend too much time out there. For the last few days it's been no more than an hour or so of wiring before my finger tips start to get too cold to do intricate work. I'm not alone; even Mr. Cabot Bennett is finding current conditions to be a little on the cold side, and that's in the house!


As far as the wiring goes, at least the wires are getting bigger. Oddly enough, despite its prominent size and the verbose description of it in the plans, I had trouble finding this one:


The problem turned out to be that I had snugged it up in between the cylinders to keep it from getting hung up on anything when we were moving the engine out to the hangar.

I also had a little trouble finding the Rotax-supplied connector that it will mate to. It wasn't in the Van's baggies - it was sitting in the little cardboard box that came with the engine, which in retrospect makes perfect sense, considering that it was, well, Rotax-supplied.


There's a lot more wire than needed, so the excess gets folded back against itself and tie-wrapped into place. There's another wire whose purpose escapes me at the moment that gets coiled up and tie-wrapped in the same neighborhood. Given that it leads to the trigger coil, it might be used to provide RPM info to the tachometer.


The next wires were the two big white ones that attach to the starter motor. The first comes off of the starter relay and gets attached to the least accessible starter motor lug that I've ever seen. I had to reach down through the engine mount and past the big ignition modules to delicately place a washer on the stud. Well, that's what was supposed to happen, anyway. What actually happened is... I dropped the washer. And it was just the right size to have enough momentum to roll away, but not quite heavy enough to make any noise while doing it. I finally found it four or five feet away from where it first hit the hangar floor.


That was enough fun for the day.

Saturday, January 14, 2012

Hello, Winter, where ya been?

That which is unsustainable cannot last, so we all knew that we were living on borrowed time with the last few weeks of unseasonably warm 40+ degree temperatures. Perfect airplane working weather, it was, but no airplane work got done. Ten hour hour days at the paying, with an hour long commute home at the end of it, have left me a little too tuckered to head out to the hangar in the evenings. I had hopes for the long weekend, though....

Eighteen degrees this morning.

Well, those grapes were probably sour and there were errands to do today anyway. My new (as of today) Saturday morning errand is to go to the butcher shop, as long as I can get there early. I gotta say that as much as I love my K-cup coffee maker, the best gift I received this Christmas was the discovery of a nearby butcher shop. The place gets crazy busy, but as it turns out you can be pretty much the only customer in the store if you get there just after 8am on Saturday mornings.

My list of must-gets read: ground chuck, Colby cheese, and sandwich spread.

This place is like Sams Club or Harbor Freight to me, though, in the way that it triggers my impulse-buy gene. I left with, in addition to aforementioned staples, beef short ribs, philly steak, two hot italian brats, super-hot pepper jack cheese, hot colby/pepper jack cheese, sliced deli roast beef, goetta, and a bag of sub buns for the philly steak and deli roast beef.

I like hot, spicy cheese, but it's hard to find in the big-box grocery stores. Their selection is like a Chinese food buffet: they have to keep it bland to appeal to the masses. I didn't know that the butcher shop had any hot cheese, but when I asked the Meat Dude for "Two hot Italian brats," I jokingly added, "and I mean a count of 'two', not that I want the brats that are too hot." Once he got the joke, he replied that they only had one kind of 'hot' in the Italian brat genre, but if I "wanted to talk cheese, I have this super-hot...."

After gathering up $46 worth of impulse buys, I had to swing through the big grocery to pick up a few things for the braised beef short ribs that were planned for tonight's dinner. (they're currently in the oven as I write this) including some fresh vegetables and a sprig of thyme. I have dried thyme. but I use only the finest and freshest herbs for butcher shop meat!

Before I could start on the ribs, I had to run another errand with Co-pilot Egg. I have been struggling to figure out what to do about her damaged car with regards to figuring how much she is owed in damages. I took it to a local body shop and got a repair estimate of roughly $2,300,  but that's more than we'd get for it when we eventually trade it in, so there's no chance that we will get that work done. I finally realized that what I really needed to know is the difference between today's trade-in value and the old value. I figured I could just go get a quote from CarMax ("We Will Buy You Car Today Even If You Don't Buy One From Us!") for what they'd pay for it today and compare that to the Blue Book value to arrive at a fair amount. That took a couple of hours and it wouldn't have been bad at all if we could have walked around shopping for cars, but remember: 18 degrees.

Getting the ribs ready to braise took quite awhile - it's a new and complicated recipe that involves making a coarse puree of vegetables, cooking them in a cast iron skillet until they "develop a crud" (seriously, that's what the recipe says!), adding wine and reducing it (apparently not in the same way that I've been reducing the left over amount in the bottle), and adding water and a bundle of fresh thyme. Once all that's done, it goes in the oven for three hours.

I can tell you right now that I won't be making this recipe again. No matter how good it is, I just can't afford the thyme. [RIM SHOT]

With three hours to spend, I dressed up in my winter work clothes for the first time this year and ran out to the hangar. There were a couple of things that I wanted to get wrapped up. First on the list was to try to organize some of the engine wiring. I had ordered some supplies from Aircraft Spruce in furtherance of this task and the box had arrived while I was at CarMax. The wires that I wanted to do most were the set of three that go to the manifold pressure sensor.


With that job wrapped up (anyone that knows me can tell you that I'm just going to keep that up until you acknowledge the pun!), there were just a few loose ends (yeah, but this is a new one. You'll see.) left on the page. There were three more wires that needed to be winnowed from the pack, routed to various locations on the engine, cut to length, stripped, and fitted with terminals. The terminals to be used are these:


Two of these wires will feed data to the engine management system where it will be displayed as cylinder head temperature (CHT) and the third will send oil temperature. CHT is often gathered by putting a ring-shaped thermal coupler between a spark plug and the cylinder head, but Rotax has a niftier system. They provide a neat little attachment point:


The oil temperature uses the same method:


Van's details an easy way to attach the wires to the engine to keep them from flopping around. They use two tie wraps:


There are a lot of people that don't like to see wire ties used this way because they can cut/chafe the underlying part, so I don't know if I will ultimately leave them like this. I may order more wire wrap and see if I can bundle them into a little cable like I did with the manifold pressure wires and then use smaller cushion clamps to hold the cable, but only if I can find the thyme. [GROAN]

Sunday, January 8, 2012

WATDI

WATDI is another of my home made acronyms, just like classics such as the HVDFP (High Visibility Driving Finger Portal, aka 'sun roof') or VIO (Vacationing In Office, aka 'slacking off at work') - it stands for Work Avoidance Through Demonstrated Incompetence. The concept is simple: don't want to be put in charge of paying bills? Just bounce a couple of checks. Don't want to have to wash dishes? Break a few. Don't want to mow the lawn? Just run over one of the pets. See? It's easy!

I point this out as a warning, though. You see, if you ever want to mess up your hard-earned WATDI rating, build an airplane. Demonstrating sufficient ability to construct something that actually looks like a real airplane to the casual viewer makes it impossible to beg out of repair jobs at home. If you really want exacerbate the problem, fix a furnace. Do that and your Saturday mornings are going to be full of things like "Can you fix that slow draining kitchen sink? If you can fix the furnace, you ought to be able to...."

Well, that's not really how it happened. The right side kitchen sink had been draining slowly for at least a couple of years now, despite my repeated attempts to find and remove whatever obstruction in the pipes was blocking the drainage. Running the disposal would push the water out, though, so I just lived with it. Until Saturday; that's when it started gurgling in a skin-crawling sort of way.

It had to be fixed.

A little troubleshooting (by which I mean "noticing that there was a lot of food still in there") indicated that the inner grinding thingys of the disposal were welded in place with rust. Without the grindy thingys whirling about, food fragments weren't being disposed of, they were just being given a very exciting amusement park ride. After a lengthy period of ineffective grinding, the food bits just about clogged up the whole works. Easy fix: replace the disposal. Off to Lowe's for a replacement disposal, along with an impulse buy that would also need installing. We'd been looking for a new shower head and happened across just what we were looking for while hunting for the disposals.

The disposals Lowe's had were a little different than the one I had removed in that they had no plug-in cord and the fitting for the drain pipe did not have threads to take the fitting on the end of the drain pipe. The very knowledgeable Lowe's guy was able to gather up the extra parts I needed and save me from having to make a return trip. Yay, Lowe's!

Insult was added to the injury of my chore-laden morning when we returned from Lowe's to find the new fuel pressure sensor that had been sent by Van's. It was interesting to see how they're able to come up with small, low-shipping-cost boxes when it's them that's footing the bill:


If I had ordered the thing, it would have come on a cubic foot box and cost $28 to ship.

The disposal job would ultimately take only twenty minutes or so, a stellar performance that I attribute to the expert management of Mr. Cabot Bennett, seen here inspecting the work area for safety and dropped foodstuffs:


The instructions for installing the wire/plug were surprisingly comprehensive, comprehensible, and cogent - it was done in no time, as was the installation of the horizontal drain pipe.


It even turned out to be quite simple to get the new unit installed, the first time.


Unfortunately (and very characteristically), I had forgotten to put the threaded fitting for the drain pipe back onto the horizontal pipe. It all had to come back off to have the fitting re-installed.

The shower head should have been easy in comparison, but it took hours. What should have been a simple twist-off and twist-on operation was derailed by my inability to get the old head off of the pipe. Instead, I ended up accidentally unscrewing the entire pipe. That turned out to be okay - I was able to take it out to the hangar and hold it in a vise while I wrenched it off. The problem turned out to be a massive over-usage of Teflon tape.

Amateurs.

A second problem arose when I screwed the pipe back in, using the normal one or two wraps of Teflon tape. When tightened snugly, the pipe was pointing up at the ceiling, not down towards the routine showering position.

Ah, that's why there was so much Teflon tape! I added a few more turns and tried again. A perfect fit.

This morning I was able to get out to the hangar to get back to work on the engine wiring. The first step was the installation of the fuel pressure sensor. It slips into the bracket on the firewall and gets an elbow fitting screwed into it. It's an odd installation, assuming that I'm doing it correctly, in that it fits fairly loosely into the bracket even when the elbow is tightened as much as I can get it. Perhaps the fuel hose is enough to hold it in place.


The next steps would have been horribly confusing had I not received the following missive from another builder that is working on the same steps I am:
Here’s my conundrum: The plans identify the WH-J48 as colored WHT/BLU, and the J-49 as BLU. Simple enough. However the Firewall Forward wire bundle contains NO blue wires. Nor does it contain any wires identified as “J-48/49”. Curiously, It DOES contain two wires of the same gauge as the wires in the WH-RV12 IGNITION (labeled as J-152/153**), that are the proper length, and come pre-terminated with the correct male pins, but they ain’t BLU – they’re both WHT, and only WHT. The only identifying marking on these white wires is a tag identifying one wire as “J-762” and the other as “J-763”.

Fast forward – through the process of elimination I skipped forward in this section and installed all remaining wires. All were accounted for and correctly identified, except the two WHT wires described above as J-762/763.

So I’m left with:
J-152/153** coming from the Ignition module,
and,
J-762/763 coming from the firewall forward bundle.
but,
No description as to who get connected to whom.

(Logic could dictate that J-152 marries J-762 due to the similarities of their identifying numbers, but I don’t want to take that chance with my ignition system)

**BTW – for what it’s worth J152/153 are also described in the plans as being BLU and WHT/BLU when in reality they too are both WHT. They do however contain an attached label identifying them by number.
I had the exact same problem.


Note that the wires in question are white. White, white, white. Or, in the vernacular, WHT.

BLU is nowhere to be seen.


The wires are pre-stripped to expose some shielding. The bared parts of the wires have to be clamped in along with the ignition wires, and have to have their exposed shielded areas in contact with the bigger wires.


The end of that cable gets routed back around the aft end of the engine and down to the area where the wires that come through the firewall are resting. At first glance, I thought I was supposed to feed the connector through the cushioned clamp that holds the main wire bundle. Does that even look possible?


Nope! Luckily, it's not required. What actually happens is that there are two wires that have already been run through the clamp; the ends of those wires have pins that get inserted into a matching connector. These are the other two wires detailed in the note above.  Note the apparent lack of BLU.


I decided that the idea of the wire identifiers ending in '2' being matched together and the wires ending in '3' being put together made perfect sense. I figure I've got better than 50-50 odds of that being right, and if not, it won't be too hard to change to the other configuration.


I then dug out a purple wire that forks at the end. I believe this wire has something to do with some sort of "easy start" functionality. If so, that will be the first easy thing about them.


The difficulty with them is that they have to be inserted in the back end of the A2 and B2 connectors. Do you see the two connectors down under the orange fuel line in the picture below? Those are the A2 and B2 connectors, and the back end of them is the side away from the part you can see in the picture. I remember being offered the opportunity to separate these very connectors a few weeks ago when I first starting working on the engine. The semantics of the directions weren't entirely clear, though, so I did not separate them.

For that, I paid.

Dearly.


Separating the connectors is a delicate operation involving the insertion of the blade of a small screwdriver in exactly the right place and applying exactly the right direction and force to release the locking tab. It's easy once you get the hang of it, but the problem here is that I could not get a screwdriver down below the connectors to use it on the release tab.

There then ensued a good twenty minutes of flailing around trying to find a way to get at those release tabs. I finally came up with the idea of using a screw driver bit from my electric screwdriver collection held tightly in the jaws of a pair of vise grips. It was difficult even with my newly invented tool because I couldn't remember the exact position and pressure required. I eventually gave up trying to figure it out blindly and practiced on the much more accessible A1 connector.


The idea is to insert the purple wires into the unused holes on the connectors. That task is made more difficult (as if it wasn't frustrating enough to even get to this stage) by the presence of a plug placed in each of the holes. The removal of those plugs required the invention of yet another custom tool:


Yep, I just pushed a piece of safety wire down through the top opening of the hole and pushed the plugs out.

All that was left to do was push the purple wires in. Not easy, that. They pins on the wires have to be in exactly the correct rotational position to fit into the connectors. It took a few attempts with the forceps that I picked up in the dental tool aisle at Harbor Freight (Harbor Freight - The Home of Budget Priced Surgical Instruments) to get the pins correctly positioned and pushed into the connectors.


Following that near debacle, it was a relief to next work on a far more accessible piece of wire. This is the wire that runs from the oil pressure sensor back to wherever the aircraft designer needs it to go. Rotax has no idea where that may be, so they give you quite a bit more wire than an RV-12 needs.


I cut off most of that wire and attached what remained to the wires that will connect to the engine management module of the Dynon Skyview, some day.


That was enough for the day, considering that it wasn't nearly as warm in the hangar as I had thought it would be. Here's what it looks like now:


Man, that think is starting to look so much like an airplane that I'm never going to be able to get out of home repair jobs again.