
My first thought was that I'd soon be forking over a few hundred bucks to an appliance repairman, but the coincidental timing of it, coming right on the heels of my having replaced the garbage disposal as it did, made we wonder... could these events be related? Wouldn't that be more likely? Yes, yes it would.
I thought I'd review the installation instructions to see if maybe I had missed something having to do with the tube that the dishwasher drain hose attaches to. The more I thought about it, the more I became convinced that I might be on the right track. After all, not everyone would use that pipe and those that didn't probably wouldn't appreciate the messy water that would pour out of it if the disposal became backed up. Surely there was some form of plug that I was supposed to have removed. This would all be answered once I retrieved the installation directions from whatever safe place that I had had stored them in to prevent their loss.
Yeah, it's a good thing I was able to find a PDF version of them on the internet.
Sure enough, right in the middle of the preparatory steps that I had ignored because all of the parts installed in those steps were already installed in my sink was a step that showed how to knock out the dishwasher drain plug.
It was an easy fix, but I'm becoming more than a little concerned over my propensity for requiring multiple attempts to get something right. I'm building an airplane, you know. Think about that...
Today's airplane work also involved tubes and hoses and drainage. The first hose to be installed is the hose that will provide manifold pressure information to the flight management computers. Manifold pressure is typically used as an engine power reference in more complex airplanes than the RV-12, but having access to more engine performance information than I'm used to having is just fine with me, besides which, the installation of the hose took about five minutes. Most of that was spent tracking down which hose to use.
First step: cut off a 15" length of this stuff.

Then remove one of those Rotax plugs from the manifold pressure nipple. It's plugged by default because Rotax, just like the folks at Badger Garbage Disposals, doesn't know if the final installation will use the manifold pressure or not.

Finally, attach point A to point B with the hose, then tie it into place.

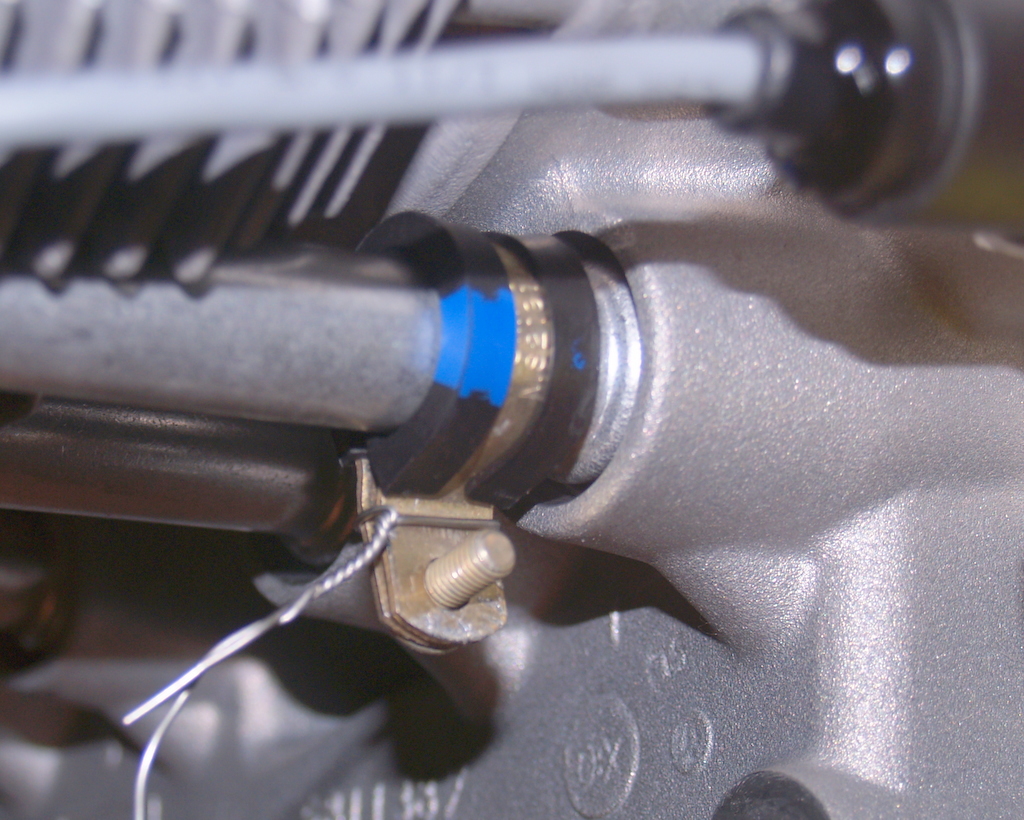
Then it was on to something brand new. Apparently there have been a lot of problems with the fuel pumps on some of the older RV-12s that involved a lot of fuel leaking from the pump. Fuel leaks are not good, but they are even worse if the leaked fuel doesn't have a safe path out of the engine compartment. I have one of the new fuel pumps, as can be determined by the existence of a fuel drain nipple built into the pump. Just letting the fuel drip out of that nipple wouldn't do any good; it needs to be chauffeured overboard. This involves rubber hose, clamps, and aluminum tubing. All of the parts and materials required come in a single bag. I suspect this packaging will allow retrofit kits to be sent to owners of the older RV-12s.
The hose is cut into two lengths: a 2" piece, and a 19" piece. That leaves a short piece of left over hose - that came in handy a few steps later.

The 2" piece gets attached to the fuel pump with a clamp. A 1/4" nut driver worked best for securing the clamp; I tried a number of different screw drivers, but the slots in the clamps were kind of weird - they rejected the screw drivers. There's probably some special tool for that, or I'm just clumsy. I'm right around 50-50 on which it is.

There will eventually be an aluminum hose that runs underneath the cylinders, but for now we just install two cushion clamps that will make up half of an assembly that will secure the hose.

These cushion clamps are notoriously difficult to work with. Van's suggests using safety wire to hold them closed while getting the screw in place.
The one at the back of the engine was much harder to get at. It took some clever coordination of locking tools to get the safety wire on.

The 1/4" aluminum tube comes rolled up, so the next step is to roll it flat, then cut it to length. Both ends then get flared.

The standard flare is too big to fit in the hose, so it needs to be filed down. The ScotchBrite wheel made short work of that. With the two pieces of hose already on the airplane, the extra left over length came in handy for testing the fit.


The aluminum line then gets bent to fit, which is simply a matter of bending it to match the full size template provided in the plans. By "simply," of course, I mean it was somewhat complicated. The problem is that the line gets bent in three dimensions, but the flat pages of the plan can only show two at a time. It takes some skill at visually imagining a 3D part based on 2D drawings, a skill that I do not have in anything approaching sufficient quantity. I muddled through, though.
The aluminum line fit well enough, so it was on to the final task: getting the line secured with the remaining cushion clamps. The first was difficult, but it turned out well enough.


The second was horrible. I had to resort to using the surgical clamps that I had picked up in the neurological surgical tools aisle at Harbor Freight (Harbor Freight: The Home of the "No More Than 75% Post-Operative Mental Acuity Loss" guarantee!) to hold things in place while I tried to get the fasteners installed.

Finally, just a couple of tie wraps are used to hold the hose in place. I don't know if there are any steps coming later than do a better job of securing the loose end of the rubber hose in place, but if not I will just figure out a way to do it myself.

No comments:
Post a Comment